Getting Started
Once Site Sniffer is installed, go to the settings page at Dashboard > Site Sniffer > Settings to configure your development system web root. This will typically be the directory http://localhost is mapped to and can vary greatly between systems.
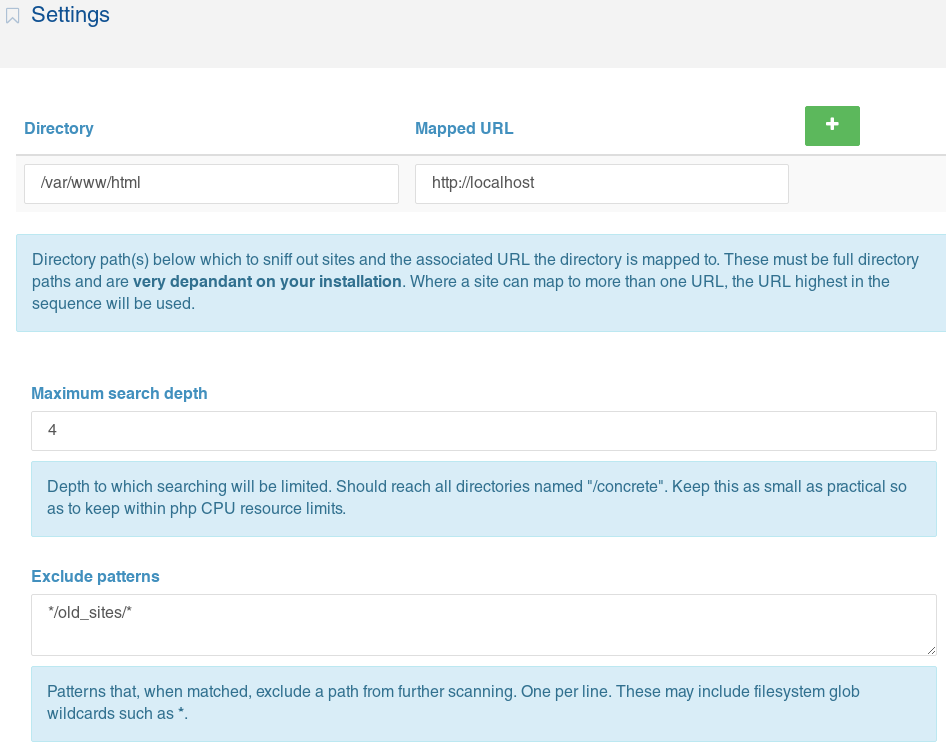
The other settings available are for the depth to which Site Sniffer will search, paths to exclude and whether to scrape package version numbers. Use these to control how far beneath your web root Site Sniffer will search for sites and to exclude unwanted paths form Site Sniffer's searching. Ideally, the search depth should be just enough to find all sites and no deeper. The CPU resources needed to search increase exponentially with the depth, so setting it carelessly high could result in a 500 error.
With the settings saved, now go to Dashboard > Site Sniffer > Sites and Site Sniffer will show a list of all the Concrete CMS sites it can find beneath configured directory.
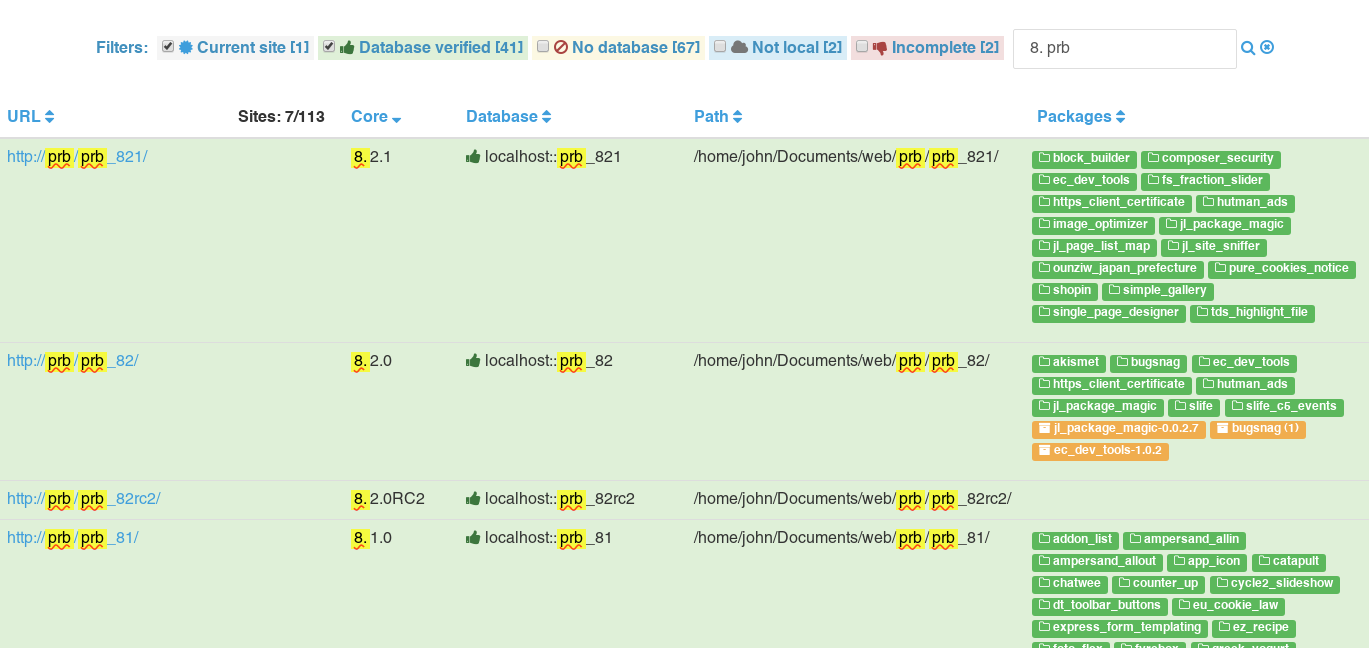
This page may take a while to render first time, but after that the list is saved and re-used, so you can leave the sites list page and return without experiencing the same overhead.
When you need to check for new sites or packages, click the Refresh button and Site Sniffer will make a new search. This is all independent of the Concrete CMS cache because, as a developer, you will likely be clearing site caches frequently, but not adding new sites that often.