Problem Solving
Selecting tab templates
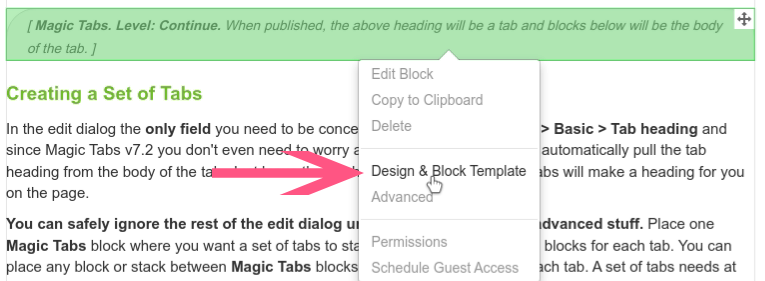
Tab templates are selected in the same way as any other block template, using the Concrete CMS "Design & Block Template" dropdown. The only difference is that you select the template for the first tab in a set. All subsequent tabs in the set will then follow that template.

Tabs render as simple headings
Each tab is initially rendered as a simple HTML <h2>, <h3> or <h4> element, where the value of n depends on the level of the tab, the tab template and how you have Magic Tabs configured.
You may see this briefly while a page loads. Then the Magic Tabs JavaScript does its stuff and transforms these headings and their content into beautiful tabs.
If you continue to see headings, here are some things that could be wrong:
- Tabs cannot span page areas. See A tab set needs to be within an area.
- You don't have a complete set of tabs. You need to have a minimum of 2 tabs with content and an end. See Each tab must wrap one or more blocks.
- There is an html error on your page, such as a poorly constructed HTML block or a bug in your theme. See Broken HTML can prevent tabs rendering.
- There is a JavaScript error on your page or in your theme. See Broken JavaScript can prevent tabs rendering.
Tabs do not operate in edit mode
Magic Tabs transforms a page as it completes loading.
In edit mode and on dashboard pages the tabs are disabled and a marker shown in their place, so you will see all tabs and their content strung out down the page.
When the page is saved and published, the Magic Tabs JavaScript is loaded and transforms the page to tabs as it completes loading into the visitors' browser.
Transition while a page loads
Magic Tabs transforms a page as it completes loading. For a large or complex page, this means you may briefly see content without the tabs while the page loads.
If you want to hide this, use Block Design and Custom Teplate > Advanced (cog) > Custom Class to add the class 'magic-tabs-hide' to any blocks (including Magic Tabs blocks) you want to remain hidden until everything is ready. Magic Tabs will then show the hidden blocks and tabs when everything has loaded.
- Applied in block design, 'magic-tabs-hide' hides a block when not in edit mode and is removed when tab sets are ready.
- 'magic-tabs-hide' can also be applied in area design, so hiding an entire area while tabs are rendered and so avoiding the need to add to block design for individual tabs and their content. This can be convenient if a tab set fills an entire area.
See Hidden Blocks.
Automated tab headings are not as expected
When you don't input a tab heading in the tab edit dialog, Magic Tabs will look for a heading in the body of the tab. This can be a really useful feature for both convenience of adding tabs (Quick Add mode) and for convenience of keeping tab headings in synchronisation with the content of tabs. It has been used extensively within the pages of this site.
If you are seeing an unexpected heading, it can help to understand a little more about how Magic Tabs picks a tab heading.
When Magic Tabs sets up the tabs, it searches through the body of the tab for each of the following items in sequence. Hence it will only check for a <legend> if it has not found any <h1>...<h6> anywhere in the tab, and it will only bother looking for a <button> if none of the previous searches has found anything suitable for turning into a heading.
- The first of any heading <h1>...<h6>. An <h6> at the top of the tab body will take priority over an <h1> lower down.
- <legend>
- <label>
- class="ccm-block-page-list-title"
- title="..." - any title attribute
- alt="..." - any alt attribute
- <caption>
- <th>
- <td>
- class="googleMapCanvas" - auto heading will be "Map"
- <a>
- <button>
A tab set needs to be within an area
Some important points to bear in mind:
- Tab sets cannot go across the boundaries to an area.
- There must be at least 2 tabs in a set.
- Each tab needs to contain one or more blocks.
- Each layout is effectively a block containing nested areas. You can have a complete set of tabs within a cell of a layout, or complete layout within a single tab, but you cant skew tabs in and out of layouts.
Each tab must wrap one or more blocks
Here is a simple example of sequence of blocks within an area. You can have other blocks before and after, but this sequence of wrapping what you want within each tab with Magic Tabs blocks is the essential part:
- Magic Tabs Block 'Tab A'
- One or more blocks in tab A
- Magic Tabs Block 'Tab B'
- One or more blocks in tab B
- Magic Tabs Block 'Tab C'
- One or more blocks in tab C
- Magic Tabs End
The above will then show as a Tabs A, B and C. Clicking each will show the associated tab content.
In most cases, if a set of tabs does not follow the above structure or is incomplete, Magic Tabs will leave it as simple headings.
Layouts give unexpected results
Each column within a layout is rendered as a psudo-area.
For users familiar with other (less advanced) tab addons that depended on layouts, this can be initially confusing because the layout based tabs of the other addons will not map directly into Magic Tabs. The blocks need to be moved so the Magic Tabs blocks and their content are organised linearly within a single page area, or a single layout cell within a page area.
A layout is effectively a block containing nested areas.
- You can have a complete set of tabs within a cell of a layout.
- You can have a complete layout within a single tab.
- You cannot skew tabs in and out of layouts.
See Tabs and Layouts.
Tabs and Block Design
Magic Tabs preserves any Concrete CMS block design applied to the blocks within the tabs.
Block design applied to the actual tabs blocks is discarded. This is because Magic Tabs only uses these blocks as markers for splitting up other blocks. When the tabs are rendered the blocks are not really there.
Magic Tabs has no opinion about area design applied to the area within which a set of tabs resides. If you want a background behind an entire set of tabs and their content, creating a layout of 1 column and placing the tab set within that layout can be used in association with design for the layout.
To style the actual tabs, the self contained starter templates are intended for copying and renaming into /application/blocks/.../templates/... and then modifying the tab design to whatever you like.
With Bootstrap based themes, Magic Tabs is pretty good at inheriting the theme tab styling. Magic Tabs also provides theme specific templates for the Modena theme.
Magic Tabs applies copious marker classes that can be used to identify sets of tabs, individual tabs and individual tab bodies which you can use in your own CSS.
Broken HTML can prevent tabs rendering
An html error on a page can confuse a browser about the page structure and either prevent ConcreteCMS from completely rendering a page or confuse JavaScript on the page from selecting the correct page elements.
This can cause bigger problems than just preventing Magic Tabs from doing its stuff. Other addons can be affected and the dashboard bar at the top of the page can be prevented from showing fully.
If a page is completely broken, you should still be able to get to the site dashboard by entering the dashboard URL directly http://www.yoursite.com/index.php/dashboard/.
Some tests to make:
- If you are developing custom block templates, swap to one of the default block templates, both for Magic Tabs and other blocks on the page.
- Change the page or the complete site to a default theme. This is an especially important diagnostic check if you are developing a custom theme. You won't loose any work; areas that are not in the default theme are retained and will reappear when you swap back to your custom theme.
More general information can be found in The block does not work! If you are using an HTML block, consider using my free Safe HTML block template.
Your browser developer console may also be of use here; the Log tab can sometimes provide diagnostics about broken HTML.
Broken JavaScript can prevent tabs rendering
A JavaScript error on a page or in a theme can prevent other JavaScript from running. As with HTML errors, this can cause bigger problems than just preventing Magic Tabs from doing its stuff and can prevent other addons from working, interfere with the dashboard bar at the top of the page and even prevent a page from being edited.
Your browser developer console will always log JavaScript errors. This is often the quickest way to find out if a problem stems from JavaScript or from HTML.
As with HTML errors, if a page is completely broken, you should still be able to get to the dashboard by entering the dashboard URL directly http://www.yoursite.com/index.php/dashboard/ and revert the page version, change the theme or uninstall a problem addon.
You can take the same steps as with HTML errors, but first:
- If you have recently upgraded Magic Tabs, try refreshing the page a few times with F5 and CTL-F5. Sometimes a browser cache can take its time to load an update to a JavaScript file, so leaving it out of step with the update. This would normally sort itself out in an hour or so anyway when your browser periodically reloads the cached file, but a forced reload can help things along.
See "Problems immediately after updating" below. - If you are developing custom block templates, swap to one of the supplied block templates, both for Magic Tabs and other blocks on the page.
- Change the page or complete site to a default theme. This is an especially important diagnostic check if you are developing a custom theme. You won't loose any work; areas that are not in the default theme are retained and will reappear when you swap back to your custom theme.
More general information can be found in The block does not work!
Vertical Tabs or Accordions not rendering cleanly
On later current ConcreteCMS versions, the way blocks are wrapped on full width page types can interfere with the way Magic Tabs are rendered for Vertical templates and nested accordions.
To allow this rendering problem to be corrected, Magic Tabs provides some global settings that can be adjusted to alter the way the grid box model is transformed when Magic Tabs are rendered. See Global Settings > Theme Grid.
Google Map only renders on first tab
JavaScript that creates complex display elements often takes information from the visibility or dimensions of their containing DOM element. A consequence is that if they are first rendered inside a DOM element that is hidden they get the wrong information and have glitches in their display. A typical example is Google Maps, where a map will not render if its canvas area is hidden, such as on a tab that is initially closed.
A similar problem can be encountered with any script based block that takes its dimensions from its visible container, including some galleries and sliders.
The following solution delays the rendering of the block until it is visible. Developers can use this to unilaterally improve the rendering of a problematic map or other block that is heavy on JavaScript. The solution has been implemented in the core Google Maps block and some marketplace blocks. However, not all affected third party blocks implement this, so you may need to create a block template (or remind the third party block developer that they need to update their block).
$(document).ready(function(){
  var t;
  var startWhenVisible = function (){
    if ($('#id').is(':visible')){
      window.clearInterval(t);
      initialiseWhatever();
      return true;
    }
    return false;
  };
  if (!startWhenVisible()){
    t = window.setInterval(function(){startWhenVisible();},100);
  }
});
In this example, initialiseWhatever() is the method that starts the JavaScript or JQuery plugin before this modification, such as initialising Google Maps. You can see this in action in the view.php for the core Google Maps block.
If the containing DOM is visible ('#id'), it is run straight away. There is no appreciable overhead or change to the way the plugin works.
If not, a polling event is started to run every 100ms (a reasonable value that many users won't even notice), and the JavaScript or jQuery started when its container becomes visible. An important part to never forget is to clear the timer when the plugin is started: window.clearInterval(t)
If the script is not using jQuery, the equivalent in pure JavaScript is:
window.onload = function() {
  var t;
  var elem;
  var startWhenVisible = function (){
    elem = document.getElementById('id');
    if (elem.offsetWidth > 0 || elem.offsetHeight > 0){
      window.clearInterval(t);
      initialiseWhatever();
      return true;
    }
    return false;
  };
  if (!startWhenVisible()){
    t = window.setInterval(function(){startWhenVisible();},100);
  }
}
Custom Blocks
You can put almost any block inside a tab, including custom coded blocks and those generated with designer content and block designer.
The only blocks you need to be careful about are those with complex JavaScript involved in the rendering that does not render correctly if hidden when the JavaScript executes (for example, some slider and map scripts need to have a size to render into - see above notes for Google Maps).
If complex JavaScript is a concern, you can create a test page for any block,
- Add 'display:none' to the block using the 'design and custom format' menu,
- View the page with your block now hidden,
- Use the browser developer console to remove the 'display:none'.
If a block's JavaScript renders correctly after such a test, it will also render correctly in Magic Tabs.
If it does not render correctly, there are ways round this for problem JavaScript by delaying the rendering until the block becomes visible - as detailed above for Google Maps.
Smooth Scroll hijacks tab clicks
If a theme or addon provides smooth scrolling, they typically initialise a jQuery plugin to work with all #anchor links on a page, or at least all #anchor links in the Main area of a page.
For example, a smooth scroller called scrollSmoothly() could be initialised with:
$('a[href*=#]:not([href=#])').scrollSmoothly()
The trouble is, such a zealous approach to smooth scrolling will catch other uses of #anchor links that would be better left alone, such as uses by Magic Tabs. The solution is to restrict the links the smooth scroller is applied to:
$('a[href*=#]:not([href^=#jl_magic_tabs]):not([href=#])').scrollSmoothly()
Now the smooth scrolling jQuery plugin has been configured to ignore any Magic Tabs #anchors, and Magic Tabs is able to function.
Integration with Ajax for Express Forms
The addon Ajax for Express Forms facilitates ajax submission of any express form, including a form split into tabs with magic tabs. From v7.2.4+, Magic Tabs automatically integrates with Ajax for Express Forms. You do not need to add any snippet of JavaScript to integrate.
Prior to v7.2.4 of Magic Tabs, you will need to add a small snippet of JavaScript to your page to make sure the Ajax for Express Forms is set up (or reset) immediately after Magic Tabs has finished splitting the form into tabs.
$(document).on('jl_magic_tabs_ready',function(ev,el){
   $.each(ajaxForms_express_form, function(bID,ax_obj){
       if (ax_obj) {
            ax_obj.setForm();
       }
   });
});
More information on setForm() can be found in the Ajax for Express Forms documentation.
The above is not the most efficient way to do this, the event handler waits for events to propagate up to the document and (should multiple sets of tabs be on a page) could be triggered several times. But the overhead is minor and it does keep everything simple. Just letting purists know there are more precise ways of doing it should they wish.
If you already have this snippet of JavaScript implemented to integrate with Ajax for Express Forms and you upgrade to Magic Tabs v7.2.4+, leaving it in place will not break anything. You can leave the JavaScript in place or remove it and Magic Tabs will continue to integrate with Ajax for Express Forms.
Problems immediately after updating
Sometimes you could update Magic Tabs with a new version and the tabs stop working or otherwise break.
The first thing to do is read the release notes - ideally before updating. While I try to avoid incompatible updates, occasionally improved functionality, new features or a bug fix can have consequences for tab settings or custom templates.
Another possibility is cached versions of files getting out of step. So clear all the caches from the dashboard and see if that helps.
Its not just the caches that can get out of step. Sometimes a browser cache can take its time to load an update to a JavaScript or CSS file, so leaving it behind the new version of Magic Tabs. This can be particularly lingering if you have implemented Apache mod_expires.
A browser cache will normally sort itself out in an hour or so anyway when your browser periodically reloads the cached file, but a forced reload can help things along, so try refreshing the page a few times with F5 and CTL-F5. See Broken JavaScript can prevent tabs rendering
Some server setups use another level of cache, often called a proxy cache or secondary cache, or a content delivery network (CDN). These can also cause the JavaScript or CSS files delivered to a browser to lag behind the current version. So after updating please remember to clear/refresh any proxy services you use to speed up your site.
Getting further help
If you need further help, please open a support request by clicking Send Message in the sidebar of the addon page on concretecms.com.
Further documentation
There is much more you can do with Magic Tabs. Have a look through these pages for examples, ideas and detailed documentation.
Whoops on install
What we mean here is an internal code exception in an addon or the core when you click the install button from the Add Functionality dashboard page or when you visit a page after installing an addon package.
If you experience such an issue, here are a few things you can check that may resolve the problem.
- Php Version. Check your php version is compatible with the addon, For example, check if you are running php5.6 when an addon requires php7+. You can find the php version in the report at /dashboard/system/environment/info. As a general guide, if your site is ConcreteCMS version 8+ then aim to run on at least php7.2. (It will run on lower versions, but less efficiently)
- Database Entities. ConcreteCMS uses a database abstraction layer called Doctrine. Doctrine works by creating proxy classes that map between php data and the database and sometimes these get out of step or muddled into a chicken and egg dilemma. The dashboard page at /dashboard/system/environment/entities has a switch to control when the proxy classes are regenerated. Try placing this into Development mode when installing an addon package (but remember to disable development mode to speed up a live site)
- File Ownership. The web server 'user' needs to have ownership, or at least full permissions, to access the package files and directory. If it does not, either the package will not install, may partially install, or may install but leave debris behind which interferes with subsequent operation. Such permissions related problems are more frequently encountered on manual installation of packages, typically where the SSH or FTP user uploading the package is not the web server user.
- Cache. ConcreteCMS makes extensive use of a number of different caching mechanisms to speed up web pages. When installing a package, sometimes outdated cached data causes issues with the install. Try disabling all the caches at /dashboard/system/optimization/cache when installing an addon package (but remember to re-enable the caches for a live site).
- Theme. Most marketplace themes are well behaved. Nevertheless, sometimes a theme can interfere with an addon package, so try switching the site theme back to Atomik using /dashboard/pages/themes. You won't loose any content on the front of your site, but some page areas may not be shown until you swap back to your theme.
- Middleware. Some addons implement middleware layers that manipulate pages before and/or after the main rendering of each page. If such addons are installed, there is a possibly they could interfere with the dashboard and other addon installation. Most such middleware implementations include condition checks to ensure they don't mess with the dashboard, but perhaps you can switch them temporarily off just to be sure.
If you experience a code error on or immediately after install and need assistance, please use the Send Message link from the addon marketplace page to report the problem. Assuming you have full error reporting enabled, on the error report,
- Prior to v9.4.0: click the [copy] button immediately below the error message.
- v9.4.0 and later: click the [Stack Trace] button and copy the content.
That will provide a stack trace you can paste into the help request and save time having to request that report later. There may also be details of an error in your site log at Dashboard > Reports > Logs.
This Example
This example uses a set of tabs with the Bootstrap 3 Themes only template with transitions set slide up/down at a 400ms speed.
The Accordion responsive threshold is set to 10,000px so the tab set will always render as an accordion.
The various jumps and links between tabs are made using Jump and Linking to Specific Tabs.
Manually Installing or Updating an Addon or Theme
Perhaps you are unable to connect your site directly to the ConcreteCMS marketplace to install an addon or theme. This manual install or update process works for all addons and themes - not just mine.
- In your concrete account, find the addon/theme in your Account > Licenses and download. Make sure to scroll down to the most recent version before downloading.
- You will not be able to download if the license is assigned to your site. If the license is already assigned, first clear the site assignment and you should then be able to download.
- Copy the zip to your site /packages/ directory and unzip (not /concrete/packages !!!). This is usually easiest using your host cPanel file manager.
- In your site, visit the Dashboard > Extend page and the theme package will be ready to install or update
The process is exactly the same for addons and themes, except themes have an extra step of activating the theme after installing.
Sometimes the last step can run out of PHP execution time. This is most likely when installing an addon or theme that installs a large amount of sample content. You should not run into such an issue with any of my addons or themes.
If you do run into such issues, you can run the install manually from the shell command line.
$ concrete/bin/concrete5 c5:package-install my_package_handle
or
$ concrete/bin/concrete5 c5:package-update my_package_handle
When updating, be sure to replace the previously installed package directory rather than adding to it. If not, you could end up accumulating obsolete debris from a previous version of the package. In general you should not uninstall - uninstalling will loose existing data and blocks. Just replace the /packages/_addon_handle_/ directory with the unzipped package update.
If you find yourself often needing to install or update many addons or themes manually, consider my Package Magic addon. Once Package Magic is installed, through the marketplace or manually, all further installs can be handled from the site dashboard using Package Magic. If you build custom code in packages, Package Magic can do a lot more. Package Magic can analyze package structure, zip up packages, upload and download zip files directly to various stores.