Basic Element Display
Basic use of elements as slider and gallery items and for formatting lightbox overlays
Omni Gallery Elements is a developer level Display Widget and Lightbox Overlay extension for Omni Gallery.
Data for each image is passed to a Concrete CMS element. It is up to you, as a site developer, to code your own element to format images and information and then select your element in the edit dialog. Omni Gallery will then use your element to build the Display Widget and Lightbox Overlay.
In our examples here, we use the simple test element Data Dump with Link. It is not pretty, its just a minimal element provided for testing. In a real application it is up to you to code an element using the image file passed to your element by Omni Gallery.
Element to format lightbox
Our first example is a Swiper carousel you will, by now, be familiar with. The difference is that the lightbox overlay shows a selected element. In this case, a simple diagnostic element.
Element to format slider or gallery items
We can do the same thing the other way round, show an element in the carousel and link to a lightboxed image.
We could also use elements for both the Display Widget and the Lightbox Overlay or different element supporting display widgets for a gallery or slider, but having seen the above two examples, you should get the general idea without a further example.
Selecting Elements
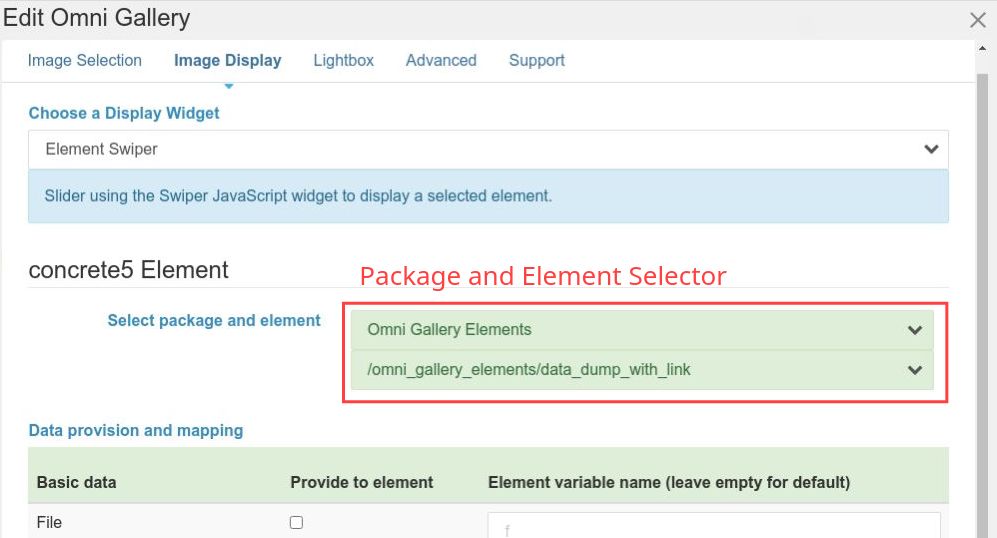
Omni Gallery Elements searches out and presents a select control for all /elements in /packages and /application.
- Any element found in a subfolder called /omni_gallery_elements/ is coded green, on the assumption that elements placed in such a named subfolder have already been coded to be compatible with Omni Gallery Elements.
- Any element in /application/elements not already coded green is coded yellow.
- Other elements may also be compatible, but it is up to you as a developer to make sure any element you configure within Omni Gallery Elements will not break your page.
This is a developer level extension.
Mapping Data
Having selected an element, we then select which data from Omni Gallery to supply to the element. By default, data will have the same name as Omni Gallery uses, but you are not restricted to that. You can map different names to supply to your element.
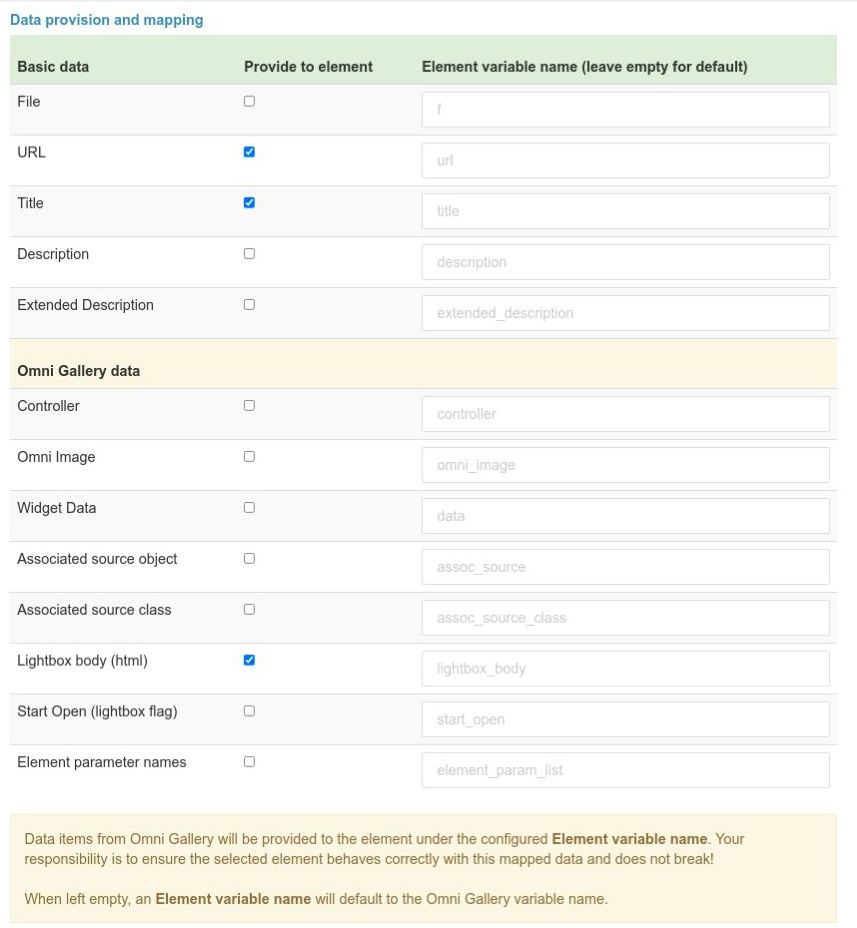
Data mapping is split into three sections.
- Basic Data - Simple string and rich text data, and the standard Concrete CMS file object $f
- Omni Gallery Data - More complex data and objects specific to how Omni Gallery works with images.
- Static Data Provisioning - Static scalar values specific to an element (see below)
The Basic Data is easy to use. It is what you, as a Concrete CMS developer, are already familiar with and is covered by the Concrete CMS documentation.
Amongst the Omni Galley Data, the main data you may want to provide and use is the Lightbox Body. From a Display Widget this will provide an HTML string containing the body of the lightbox popup. Code in the example elements named '..._with_links' shows how to attach the Lightbox Body to a link in order to implement an Omni Gallery Lightbox Overlay from your own elements.
The other item in Omni Galley Data you could use is the Associated Source Object. If you are listing files, this will be the same as $f. If you are using Omni Gallery with an Image Source listing something else, such as a Page List or User List, this will be the Concrete CMS page or user object. If unsure, Associated Source Class will let you know.

Sometimes an existing element will require some extra data specific to the element. Perhaps it expects a class name to be configured and passed by its controller. This is where Static Data Provisioning can help. Here you can list variable names and scalar values to be provided to all instances of the element across the display widget or lightbox.
If the Image Selection was based on a page or page list, we also have an option to set the context for the element to the listed page, so that when an element does Page::getCurrentPage(), the original listed page will be returned.
Where an existing element requires more complex data you are advised to code a wrapping element.
Fine Tuning the Element Selector
By default, the Package/Element selector shows all packages that have /elements, their /elements, and /application/elements.
This is constrained by configuration in application/config/generated_overrides/jl_omni_gallery_elements.php. This configuration file contains 3 lists
- exclude_packages - a list of package handles that are completely excluded from selection in Omni Gallery Elements, except elements beneath /omni_gallery_elements/ subfolders.
- exclude_package_elements - a list of package_handle/elements/path/to/exclude to target specific elements.
- exclude_any_elements - a list of partial matches, to exclude elements with paths containing strings such as /edit_ and /dashboard_ and similar, the kind of names used in edit and dashboard dialogs and hence unlikely to be suitable for use in Omni Gallery displays.
You are free to add to these configuration lists to remove clutter from your own element selection, or to remove from these lists if one of your required elements is being filtered unnecessarily.
