Sending Email
Using the Send Email form handler to send email messages on form submission.
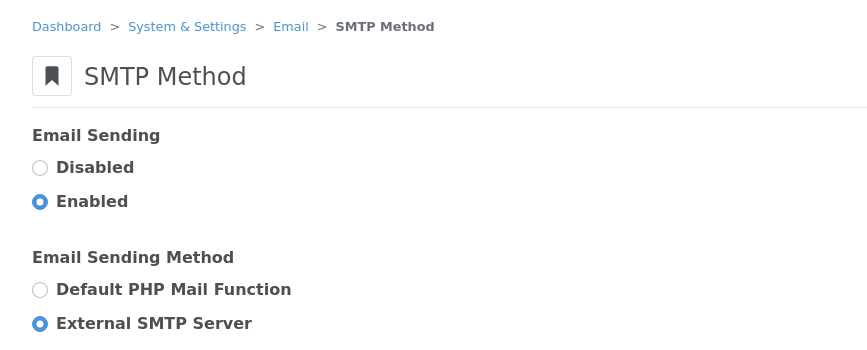
To send one or more emails on form submission, use the Send Email form handler. As a prerequisite, you also need to configure your Concrete CMS site to send email. If you anticipate any more than a trivial traffic volume, this should be an External SMTP Server. See Dashboard > System & Settings > Email > SMTP Method. If you are connecting to a GMail account, my friend Nour has posted a detailed guide for connecting a site to GMail.
The Send Email form handler
To send email when a form is submitted, you can insert one or more Send Email form handlers into the submit pipeline. This handler provides a proforma for the email. You can build the boilerplate for an email using {{place_holders}} to be filled with system or entered form values. All fields in the Send Email handler configuration dialogue can process {{place_holders}}.
We also have an example you can test to send yourself an email from a form.
Condition
An optional condition can be used to control sending of an email.
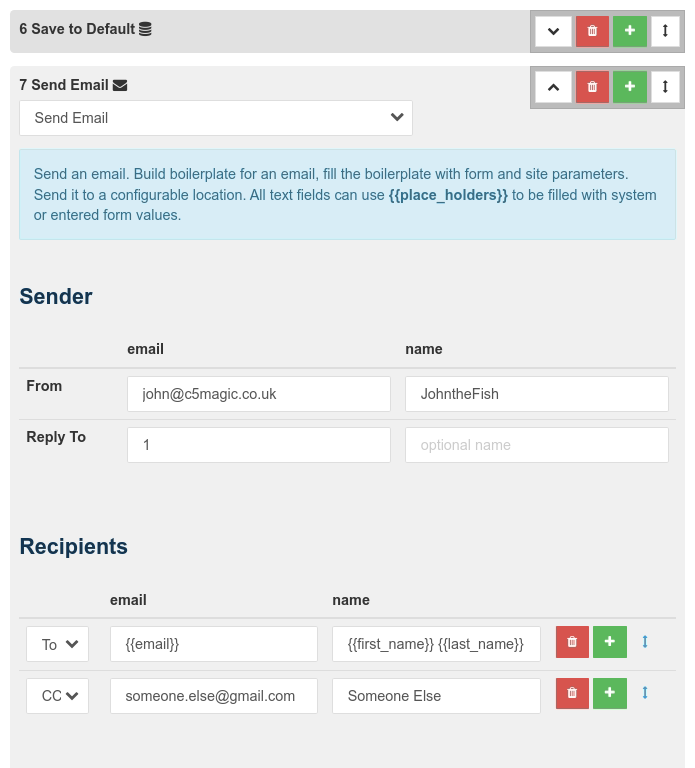
Sender
The sender section allows configuration of From and Reply To email addresses. This is similar to configuring any email client. If left empty, both will default to your site configured email.default.address and email.default.name. Depending on your mail server configuration, the From address may be restricted to your domain or even to a single address.
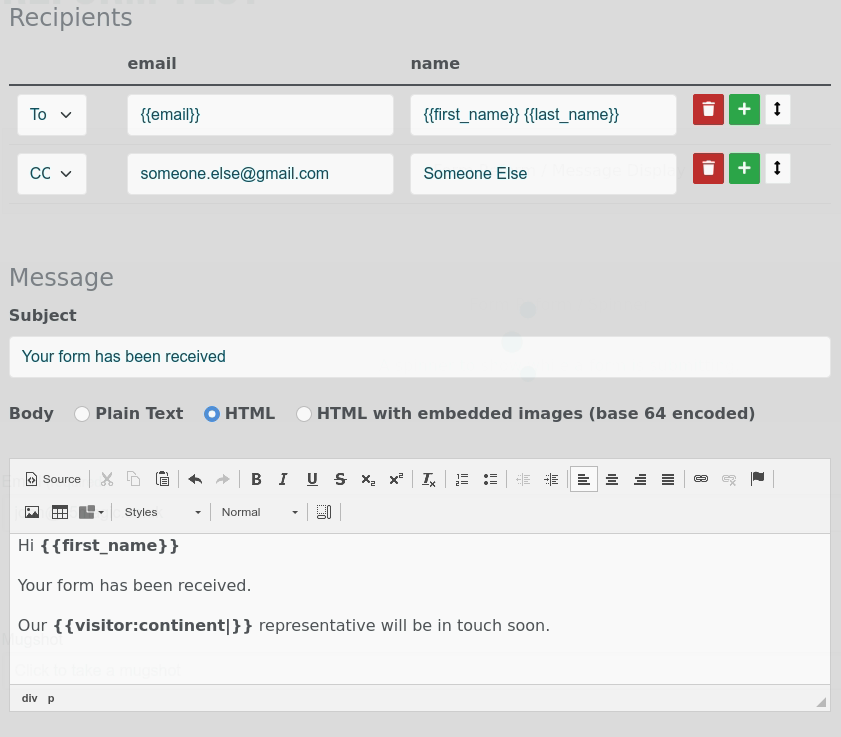
Recipients
The recipients section is a growing list. Every email needs at least one recipient and after that, you can add as many TO, CC or BCC addresses as you like. This is not designed for bulk email (see later). This is a form response, not a mailing list system.
Example
In our example below we have
- A directly entered email address for the From field.
- A user ID [1] for the Reply To field - this is just to show you what can be done. Normally Reply To would be the same as From !
- A Recipient {{email}} field submitted with the form.
- A directly entered recipient address as a CC.
These varied settings are purely to illustrate the capabilities. A real form will be more sensible!
The Message
The message part of an email is similar to configuring any message with Form Reform. You can combine text and {{place_holders}} to customize a boilerplate email with fields from the form and other data values.
The main thing to remember is that any rich text (HTML) email must be self contained. It will not have the benefit of CSS classes provided by your web site theme. Hence anything beyond basic HTML tags will need some hand crafted style="" attributes.
With that in mind, we have a third option for how the body is formatted, so that any images within the body are base 64 encoded and embedded into the email.
Inserting Images
HTML formatted emails can be sent with images.
With the HTML option, The images are not actually sent with the email, just a url to the image on your web server. With the HTML with embedded images option, images are base 64 encoded inline and become part of the actual message body.
Apart from how images are sent as a URL or embedded, everything else is the same. In its basic form, just use the image tool in the rich text editor to pick an image from the file manager and add the <img> tag into the message body.
To use an image uploaded with a form, we need to create an image tag containing a {{place:holder}} for the image URL or fid. The simplest way to do this is to add any image to create the <img> tag, then enter the [<>] source view of the rich text editor and modify the content of the <img> tag.
For example, with a Webcam input called 'mugshot', an image can be modified like:
<p><img alt="My Mugshot" src="{{webcam_fid:mugshot}}" /></p>
Once a file has been imported from quarantine and mapped to an fID with an uploader input called 'my_file', the input 'my_file' will now be the fID of the file. In this case an image can be modified like:
<p><img alt="My File" src="{{form:my_file}}" /></p>
With the HTML option, when the email is sent the {{webcam_fid:mugshot}} placeholder is expanded to the URL for the mugshot on your web server. Similarly the placeholder {{form:my_file}} is expanded to the URL of that file on your web server.
With the HTML with embedded images option,the {{webcam_fid:mugshot}} or {{form:my_file}} placeholders are expanded to a base 64 encoded copy of the image.
When the email is received, the recipient's mail client will display the image in the formatted email.
HTML
- Images are not sent with the email.
- The email sources images directly from the web server when the email is viewed.
- Email's are smaller because images are not embedded.
- If an image is deleted from the web server, the email will no longer display the image.
HTML with embedded images
- Images are encoded in to the email body.
- No further reference is made to the web server.
- Emails are bigger because they contain the images.
- If an image is deleted from the web server, the email will continue to display.
This last point of HTML with embedded images introduces a further possibility. Rather than importing an image to the file manager using the Import Quarantine Files handler, a quarantined file can be embedded directly into an email.
<p><img alt="My Mugshot" src="{{quarantine:mugshot}}" /></p>
If you only ever need an uploaded file to be part of an email, this can be a big advantage for both saving server space and GDPR because the file is not kept on the server.
This would not work with the HTML option, because the URL inserted would no longer be valid as soon as the quarantined file was cleared.
Attaching files and images
Attaching a file or image is a completely different mechanism to inserting images into the body of an email. In this case, the file is sent with the email as an attachment, hence will never need to refer back to a URL on the web server. The attachment is a frozen copy of the file at the time the email is sent.
Attachments can be any kind of file, including images.
The Attach Files section of the Send Email handler configuration has two means of configuring attachments that can be used individually or together.
- Choose from the File Manager
- None
- Individual file - just one file
- Fileset - all files in a fileset
- Folder - all files in a folder
- List of fID - typically used with a placeholder such as {{webcam_fid:mugshot}} or {{quarantine:mugshot}} to attach files uploaded with a form to the email.
In all cases it is the file that is attached, not a specific thumbnail, so it is up to you to make sure any file that could be attached to an email or embedded in an email is appropriately sized.
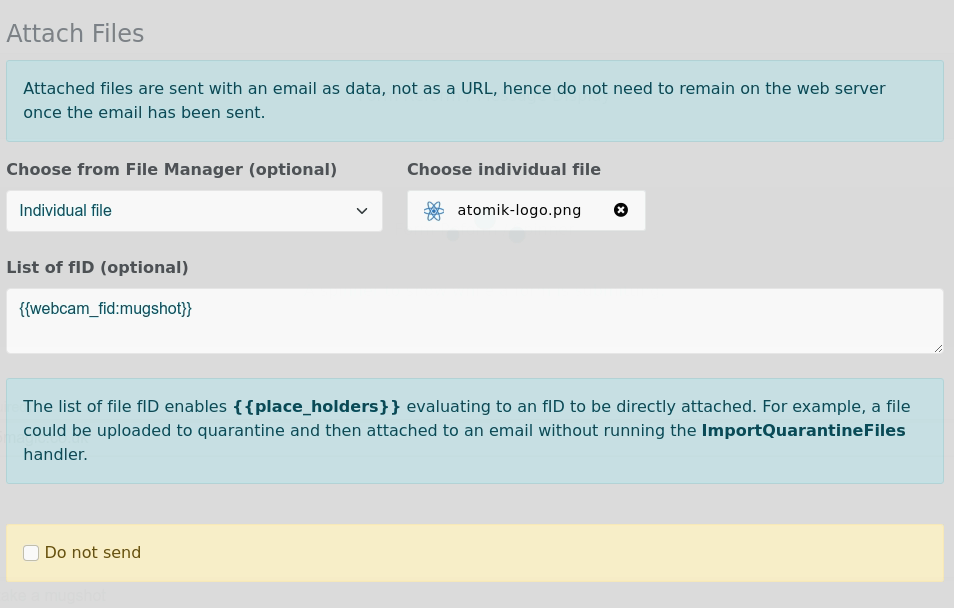
Do not send
Our final option is a checkbox to not send an email. This will do everything connected with building an email, except that sending will be disabled. This can be useful when developing and testing a form. But please remember to actually enable the sending when you have finished testing!
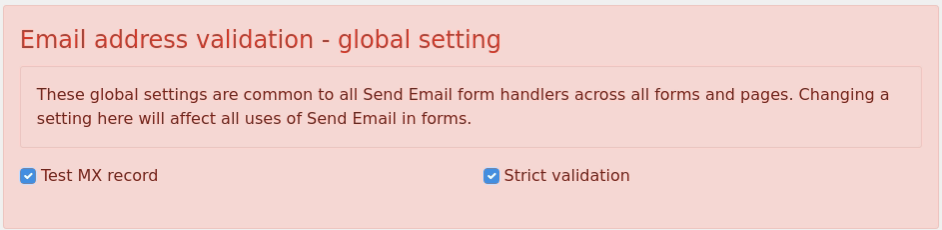
Email address validation
The default validation for all email addresses is:
- Strict - the email has to conform strictly to email address specifications.
- Test MX - the email domain is cross-checked against registered domains.
Validation is applied to any address that can be fixed at the time the edit dialogue is saved and again before an email is sent.
If your web server has the php function checkdnsrr() disabled, testing the MX record could be both extremely slow and always fail. Or it could even end in a server error. In such cases you may want to disable Test MX Record.
 In form handlers these settings are global. Configure them in one Send Email form handler and the same settings are applied across all Send Email form handlers.
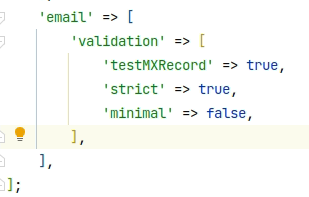
These settings can also be edited manually in /application/config at jl_form_reform.email.validation.
A further setting which is configuration file only is jl_form_reform.email.validation.minimal. When true, this will skip the entire core validator class and use basic php validation for the email address. The other flags would then be ignored. When set, this flag also overrides the validation settings for Email and Email Confirm input blocks.
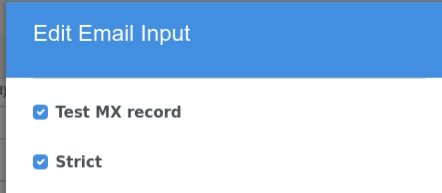 In the form input blocks for Email and Email Confirm, similar settings are specific to just that form input. Thus email validation could be configured to Test MX for user entered email addresses when the form input is validated, but not checked so rigorously when the email is sent. This would be a fair optimization to configure and gain a few milliseconds on overall form processing time.
Multiple Emails
Multiple Recipients
To send an email to multiple recipients, simply add them to the list of recipients in a single Send Email form handler.
The Recipient section is an extending list that can be added to and dragged into sequence.
Multiple Messages
To send different emails to different recipients, you can add more than one Send Email handler to the form handler pipeline, each with its own configuration.
You can also use a Condition If handler section to send different emails depending on form processing.
Bulk Email
The Send Email handler is not designed to manage mailing lists and bulk email. Any kind of bulk email will require subscriber management and unsubscribe processing as a legal necessity in most countries. If you need to manage bulk email, consider using a mailing list service.
If you require a form to connect to a bulk email service, consider developing a specialized form handler plugin for Form Reform.
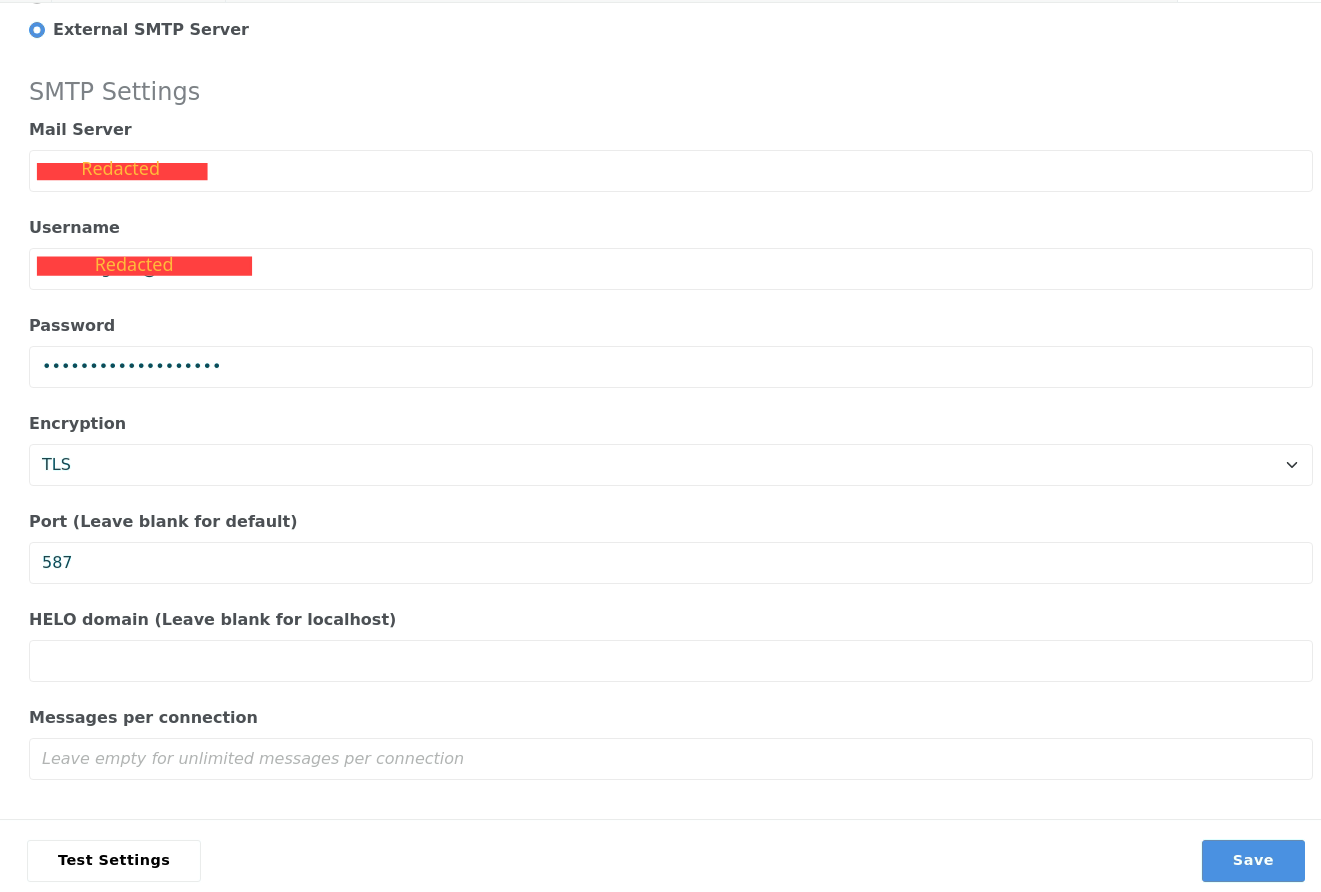
SMTP Server connection
As noted above, the default php mail functionality is not designed form anything beyond trivial use. On many web servers it may be disabled. Many recipient servers will bounce email sent by php mail or flag it as spam. Hence if you are using the Form Reform Send Email handler, you should also consider configuring your site to use an external SMTP mail server.
This can be configured at Dashboard > System & Settings > Email > SMTP Method. More details are available in the Concrete CMS Documentation.
In your SMTP account, the address in the From field must be configured as an allowed sender. The most likely reason for an email to fail is that your SMTP account is not configured to send from this address.